可參考鳥哥,很詳細。
mrtg-2.13.0-1.2 on FC 5
| #rpm -ivh mrtg-2.13.0-1.2.x86_64.rpm |
再安裝snmp。
mrtg.cfg是個範例,不用改。
#/etc/mrtg/mrtg.cfg |
在/etc/mrtg下,產生一個新的cfg檔,在這我以mrtg_6.cfg為例,接著需修改此檔(說明文字…等。此public需視SNMP廣播來源機器的Community而定,當然設備端的SNMP要開啟)。
#cd /etc/mrtg #vi mrtg_6.cfg |
而若有的port有被偵測但沒有被繪出,可能是其MaxBytes為0,原因可能是當下此port真的沒有輸出/ 人,也有可能是其他原因。但若想解決此問題,可以
|
其中 --zero-speed=1000000000表示將原MaxBytes偵測為0的,設成1G/bits,而 --show-op-down是將目前偵測為operator(administrative) down的port也要做紀錄,以使日後此port狀態改為operator(administrative) up時也能紀錄,故此一定要設定,要注意的是若要用此 --show-op-down,前面一定要加--zero-speed='數值'。而只用--zero-speed='數值'也是行的。
--snmp-options=:::::2表示使用SNMP V2,要監測>100Mbit/s時需要。而當cfgmaker沒有正確的使某介使用SNMP V2時,需自行在該Target後加上":::::2",如以下
| # for UNIX WorkDir: /var/www/html/mrtg_sssh/6 #設成你要放的工作路徑,請注意,此處要配合httpd.conf中FollowSymLinks的設定,以免無法瀏覽。 註 # to get bits instead of bytes and graphs growing to the right EnableIPv6: Yes #開啟IPV6,但若沒安裝相關套件,在執行時會出現錯誤訊息,然後此行被忽略 #Target[203.72.64.254_23]: 23:public@203.72.64.254在此後方加上":::::2" |
註 :很奇怪的是,我將WorkDir設在mrtg的安裝路徑下/var/www/mrtg/路徑名,在未重新開機前是可以讀取的,但重新開機後,竟變成Access Fobidden!!很奇怪。
接著就第一次執行,若發生語系的錯誤(因我是用UTF-8),則改成系統建議的執行方式。
# /usr/bin/mrtg /etc/mrtg/mrtg_6.cfg ----------------------------------------------------------------------- env LANG=C /usr/bin/mrtg /etc/mrtg/mrtg_6.cfg |
| #env LANG=C /usr/bin/mrtg /etc/mrtg/mrtg_6.cfg |
此時會出現以下的訊息,這是因為之前沒做過,故找不到log檔來做繪圖資料,故執行三次後應該就OK了,也不會出現任何訊息,但會產生一個大小為0的/etc/mrtg/mrtg_6.ok檔。
Rateup WARNING: /usr/bin/rateup could not read the
primary log file for YOURIP |
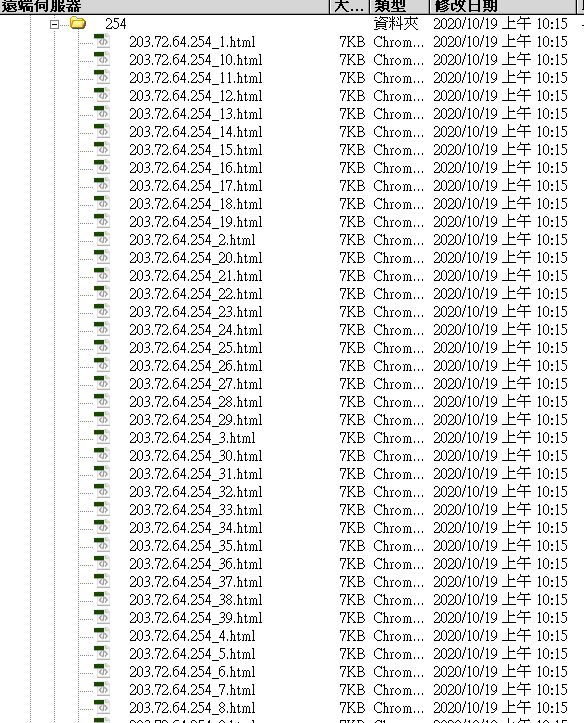
此時瀏覽剛設定的WorkDir中,有一個html檔及一堆圖檔log檔,就是我們要的流量資料,若該監看機器有一個以上的介面會有更多的資料。
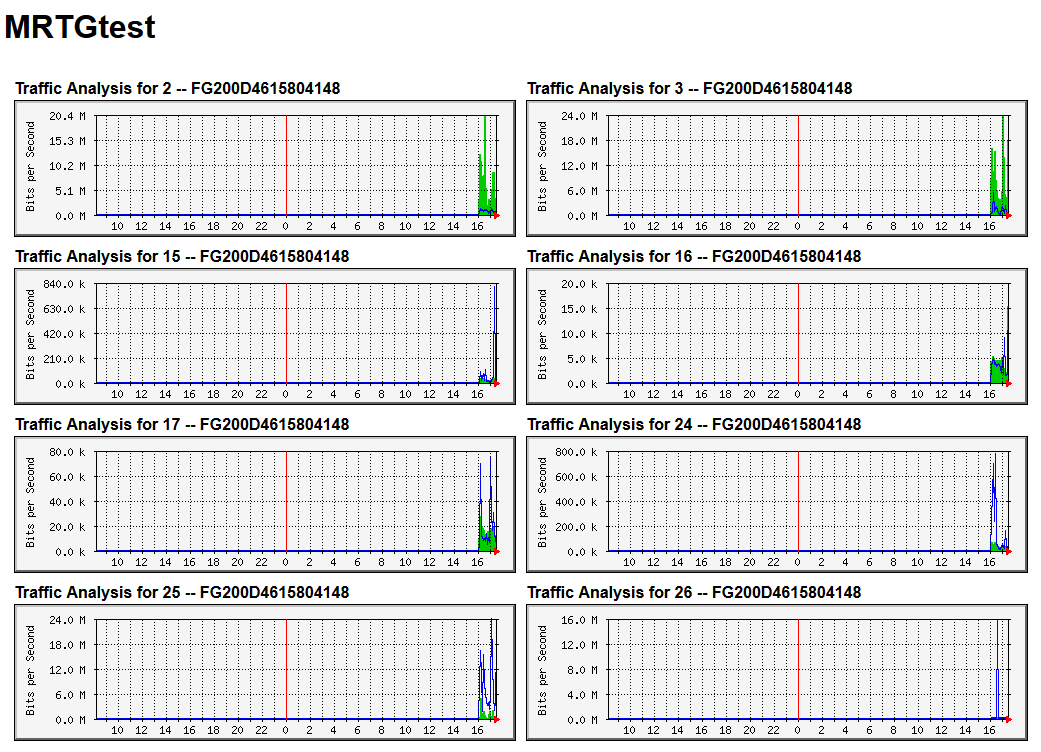
indexmaker是MRTG用來製作一個首頁用以方便連結,其實不一定要用
indexmaker --output=/var/www/html/mrtg_sssh/254/index.html --title=MRTGtest /etc/mrtg/mrtg_254.cfg |
反而在製作MRTG瀏覽網頁時,因為MRTG在Work Dir下會產生一大堆html檔,會使人找不太到想看的介面連結html,此時可在mrtg_254.cfg內,以搜尋的方式,找到所要的介面連結html。
以下為搜尋V2,找到在[203.72.64.254_25]段落內,也就是說203.72.64.254_25.html就是V2的MRTG圖形頁面。
### Interface 25 >> Descr: '' | Name: 'V2' | Ip: '192.168.20.254' | Eth: '' ###
|
此mrtg一定要定時執行才有義意,故可用crontab(例行性命令)及shell scripts來幫我們自動執行。
| # vi /etc/crontab |
| # run-parts |
| # vi /etc/cron.5minly/mrtg.sh # chmod 755 mrtg.sh |
| #!/bin/bash |
這樣就OK囉!!
在XP之「新增或移除程式」->「新增/移除Windows 元件」->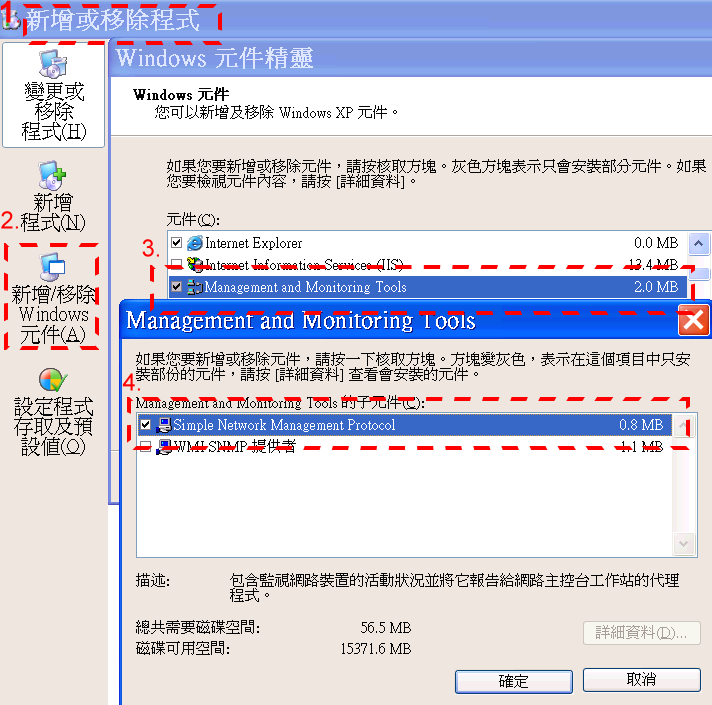
如此,XP會多出兩個服務。「SNMP Service」->「安全性」中,做如圖之設定,也較安全。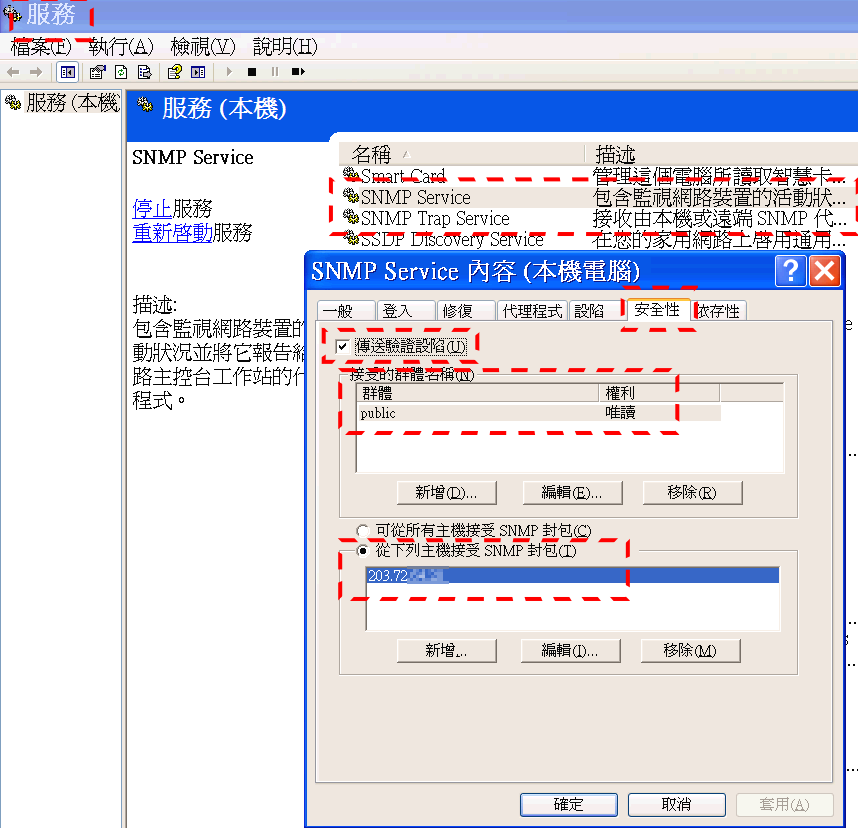
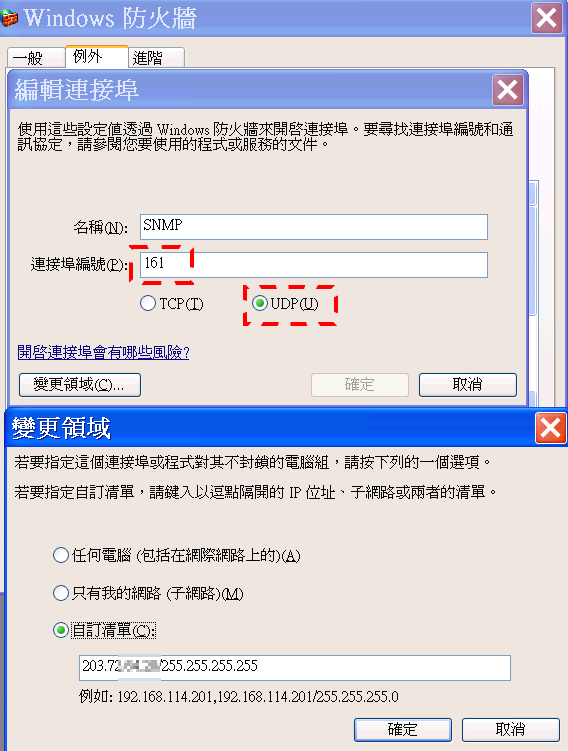
最後在XP之防火牆中要開啟UDP/161,並指定MRTG主機(為了安全性)